Sunday 4 May 2014

Project Evaluation

When given the brief, i was really excited to create images for Fashion, as this is the area i am most interested in, however In my honest opinion, this term has not only been unorganised, but also stressful and I feel it may have impacted on my work, mostly with the development of my research. However, putting behind the downsides, I believe I have grown in my skills and my attention to detail. I greatly enjoyed the more advanced side of hair, and also the master classes of Miriana and Illamasqua. I learnt a lot of tips and technical skills in these short amount of times.
I developed a vast amount of research for this project by looking on the internet, by visiting branches where makeup of Estée Lauder is sold, and also reading booklets on Illamasqua. I gained insight on campaigns, helping me to produce my final images.
Overall I am extremely pleased with my final images, however found it difficult to apply every look to my brand; Estee Lauder. I have learnt thoroughly how to apply a base, and also how to apply a perfect symmetrical lip. I have extended my knowledge about brushes and products and their application and i think this shows throughout both my final images and my timed assessment. 
I feel as though i created a story which suits the theme of Illamasqua’s brand; unique and vibrant, with the use of colours and texture.

After gaining timed assessment feedback, i am proud of myself of how my outcomes have turned out taking into consideration the problems we as a group have faced this term. My hair skills need to be improved as i believe that my makeup skills are much higher than those of hair. My confidence also has to be worked on and i have to gain belief in myself that i can do things and i can do them well. I look forward putting into practice the skills i have learnt this term, and look forward to learning new skills next year.

Bold Lip Final Images


Brow, Liner and Lash Final Images


Metallic Look Final Images


Smokey Eye Final Images


Natural Beauty Final Images-


Saturday 3 May 2014

Masterclass with Mirijana

This week we had the most amazing makeup artist come in and teach us some new tips and techniques. Mijana gave us some interesting words about brushes and where to use them best, e.g. a flat ended brush is great for a lip.
This week we were taught about eye liner, and as you can see below we learnt two new ones. One like a cat eye and another geometrical shape.
It was so much fun and such a good experience.


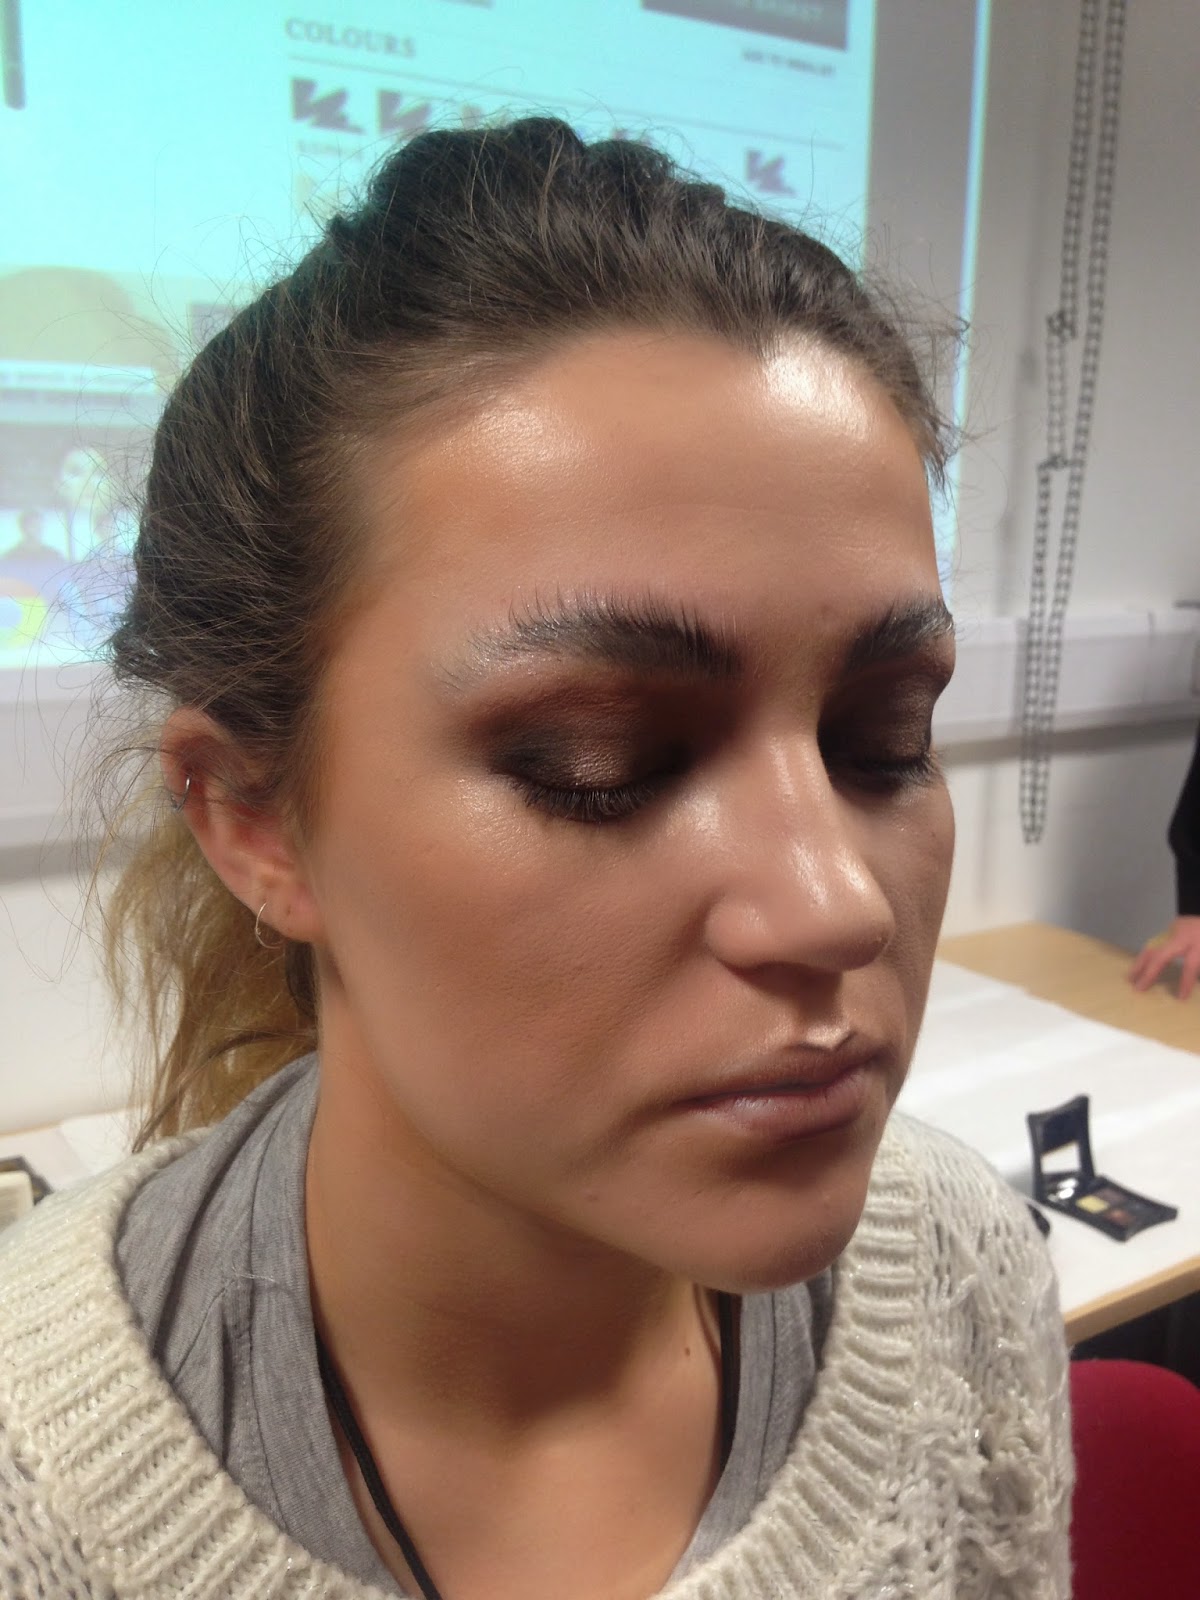
Illamasqua timed assessment facechart


Illamasqua Masterclass


FISHTAIL PLAIT


Blushers and Highlighting

Blushers and Highlighting-
Fair Skin
If you burn easily, get freckles when your burn, or if you have porcelain skin then you fall into this category. When picking a shade for your skin, remember, lighter is better.
Using a angled blush brush like the tap off the excess by “flicking” the end of your brush with your finger. This will get rid of any unwanted excess on your brush and keep you from applying to much on your cheeks. If you do apply to much, use a beauty blender and roll the area lightly, this will pick up any unwanted pigment on your cheeks.
Apply the colour to the apple of your cheeks and blend back toward the temple. For highlighting your cheeks you want to pick something for fair skin that’s a light champagne colour. Whether you choose liquid or powder form is completely up to you and really is a matter of what you are more comfortable using. Apply the highlighter right above where you placed the blush. This will add just the right amount of shimmer to the cheeks.
Medium Skin
Medium skin tones are the most common with 80% of all women falling into this category. The best blushes for medium skin toned ladies are rosey pink and deep peaches.
apply the blush to the apple of the cheeks and blend back. Again, remember, if you apply to much you can go in with a beauty blending or sponge and roll across the colour to pick up some of the excess pigment on the skin. For highlighting on medium skin toned, the best thing to use is a pale golden or warm gold. Don’t use a champagne colour or a light colour as it will look to frosty on the skin.
Depending on the kind of highlighter you choose, you can use a highlighting brush or CLEAN fingers, pat the highlighter onto the cheek bones right above the blush. The highlighter used here has a small amount of shimmer to it, using a matte blush allows you to control the shimmer and place it where you want it to be. You don’t want your cheeks to be overdone. Remember, you cheeks should look as if they have a natural flush to them.
Dark Skin
For dark skin, choose colours from rose to deep oranges. Choosing a shade that is to light will make your skin appear washed out and pale. You want to enhance the natural beauty of your skin.
Just as before, use an angled blush brush and remember to tap off an excess from the brush by tapping the brush with your finger. Gently apply the colour to the apples of the cheeks and blend back toward the hairline.

Remember, you just want to make your cheeks glow. For cheek highlighting using a gold colour is stunning. Using a champagne colour will look to frosty against the skin. Using your two CLEAN fingers, apply the gold colour to the top of the cheekbones above where you placed the blush.

Creating the 50's UPDO


50’s UPDO

- Section off the front section (in-front of ears) and decide where the hair will part.
  • Rollers go upwards at the nape of neck for two rows, the backwards from the crown, and the front section goes down the sides of the face.
  • Secure rollers in brickwork fashion, working from the bottom of the head upwards.

  • Take out the rollers, being careful not to disturb the formation of the curl. 
  • Starting at the bottom, create 3 full loops to create a voluminous barrel along the bottom of the head. To do this use the bottom two rows of curls, using a brush to tie in the roots of the hair - Do Not Brush Through The Curls at The Ends. 
  • Take pins to shape the loops, flattening the outer edges.  
  • With the rest of the hair, take each curl and create a full pin curl, without making it too flat to the head.
  • When reaching the crown, repeat the first step but in the opposite direction ( back and away from the face ) in order to create lift and volume. 

-With the front section of the hair, brush from the face and pin up behind ears, making sure to cover any gaps from the first step.

Advanced Plaitng class

 Advance Plaiting - 

Take a good square section at the front of the hair and take 3 sections of hair and start plaiting normally (working at the root).
Just like a french plait, introduce a piece of hair, however from behind at the back at the side (the other side of the head).
Slowly introduce the piece of hair into the middle section, just like a french plait and then plait normally.
For bigger distance plait again.
Take next section from back of head and introduce it like before.
Make sure sections are same width and thickness each time.
Finish plaiting and tie end off. 
Can pin up to create another look


The Reversed French Plait (the Dutch Plait)

Like a french plait however when adding a piece instead of bringing section over into the middle bring it under into the middle.

The waterfall

Works well coming from side of the head, and looks great as a half up half down style. 
Going across the head, take a square section from the front of the head and section into 3 pieces. 
It is easier wit an assistant.
Start plaiting as normal, however the middle section is then given to assistant or model to hold. To keep taught and direction.
Then another piece of hair is added from the top section, (from the middle parting)
Join it into the middle and carry on plaiting, Plait Plait and then give middle section to the model. 

Remember to keep direction going across. 


Lesson on Lips

Lips- 
Lip Liner is very important for any lip colour you wear.
Choose a colour that works best with the look you are trying to achieve. Use a toothbrush to exfoliate the lip, then add a lip moisturiser. 
The lips have 2 lines, the darker line is the natural lip, and the second is  a faded whiter line which is used to make a fuller lip. 
Depending on the line you choose to you, either the natural or the fuller lip line, starting from the middle of the bottom lip, apply the liner from the middle inner lip to the out/edge of the of the lip. On the top lip, start from the out/edge of the and draw upwards to the  inner bow of the lip.
Make sure the bow of the lip, is always rounded off for a natural look, unless the desired look is a pointed cupids bow. 
Highlighting the lip in the middle makes the lip more fuller and plump for smaller lips.

For smaller lips light colours are better as darker colours make lips look smaller.


Learning about Foundations

Makeup- Foundations-

Each foundation have their own clear purpose. Some products even have additional functions and can be used to serve the purpose of sun protection, moisturizing and anti-aging. Kinds of foundation can vary on their consistency, coverage and ingredient content.
Liquid Foundation-
This type of foundation is one of the most commonly used today because of its versatility and ease of use. Depending on its formulation, its coverage can vary from light to heavy. Liquid foundation is also usually suited for dry skin, combination skin, and when it’s oil-free, oily skin. The right kind of liquid foundation can leave skin looking “dewy” and healthy.
Tinted moisturiser-
When it comes to coverage, tinted moisturiser is on the lightest end of the spectrum. This type of product is more of a moisturiser than an actual foundation and usually only serves the purpose of evening out some inconsistencies in the skin tone.
Depending on its formulation, this product is suited for just about any skin type. However, if you have a lot of blemishes to cover, tinted moisturiser is not the right product. This product is best used to achieve a natural, no-makeup look but coverage can be increased slightly when set with powder (with the added bonus of further mattifying the skin!).
Cream Foundation-
Cream foundation is usually most suited for more mature skin. When set with powder, this foundation has longer lasting power than most other types. It usually also has better coverage than most, making it well suited for those with very uneven skin tone or with a lot of blemishes to cover. Creams usually work best for dry skin, but should be avoided by those with oilier skin.
Some cosmetics companies also produce cream-to-powder foundation, which in essence is cream in consistency upon application, but dries to a matte, powder-like finish.
Powder Foundation-
Powder foundation is also one of the most common types used today. It’s best for oily skin and usually has light to medium coverage, though some kinds of powder foundation can be applied wet in order to increase coverage. It’s also best used to retouch makeup.
Most mineral makeup (makeup created from natural ingredients) come in loose powder form.
Cake or Stick Foundation-
Cake or stick foundations usually have the heaviest coverage and are most appropriate for media purposes. The consistency of this kind of product is so thick that it can actually be used as concealer. It’s not quite suited for daily use as its thickness can worsen the condition of dry skin. It can also clog pores and cause blemishes, which is why it’s a no-no for people who are prone to acne.

Adding accessories to the Hair

Adding accessories to the hair

Customise cheap headbands with feathers or jewels to make head dresses.
Needed -
-Hairpins
-Pintail comb
-Sectioning clips
-Hairspray
-Hair Jewellery

-Using the method beforehand to create texture to the hair, it adds volume to the up do we are going to create.
-Section off the hair from the parting to just behind the ear on each side of the head and pin away.
-Backcomb the roots of the hair from the crown to add lift.
-Gather the textured hair and smooth over
-Very neatly, barrel roll the hair into a low textured bun.
-Hold in place at the scalp with hairpins and anchor them to the scalp on each side.
-Using your pintail comb, manipulate the hair into the perfect bun shape.
-Taking the two parted sections from the front, take one section and twist back and place on top of the bun.
-Repeat with other section and place on top of previous twist.

-Attach the hair jewellery accordingly.


Textured Hair

 Crimping-
- provides volume
  • layer underneath
  • backcomb, even more volume

-Crimp sections from underneath to the top of head
  • Comb out when cool

Diffuser-

Hair diffusers are a useful tool for people who tend to have dry, frizzy hair. Diffusers are attached to the end of hair dryers to protect hair from direct heat, allowing you to dry your hair without damaging it. Here's what you need to know to get frizz-free, gently coiled waves using a hair diffuser.

Drying the hair with a diffuser
-The best effects is when the hair has been washed with shampoo, conditioner and towel dried thoroughly.
-Then apply Apply anti-frizz serum. Smooth serum or another heat protective product into your hair, starting at the roots and making sure the tips get covered. This will enhance the diffuser's hair-smoothing effects while you use it to dry your hair.
-Start drying your hair with the diffuser. Fit the diffuser on the end of your hair dryer and turn it on either medium or low heat. Place the diffuser on your head near your roots and begin moving it around in a circular motion.
- Don't use your hair dryer's highest or hottest setting. Using a lot of heat will make the diffuser less effective at keeping frizz to a minimum.
- Use the prongs on the diffuser to gently lift your hair to dry it underneath as well.
-Work your way down to the tips of your hair. Continue massaging your hair with the diffuser, using a circular motion, until your hair is dry down to the tips. Use the diffuser to gently push up on your curls as you work your way down, to help retain their shape and give your hair bounce.

Using the diffuser to style the hair
-Dampen your hair. Get your hair slightly wet in the shower and towel it dry, or use a spray bottle filled with water to spritz it all over until it's slightly wet. Get your hair a little damp all over, including on its underside, and focus on the roots. When you're finished your hair should be damp, but not drenched.
-If you wish, you can start the style process after shampooing and conditioning your hair. It will take longer to style your hair if it's completely wet.
-You can try using a diffuser to style dry hair, but the effects won't be as pronounced.


-Turn your hair upside down and start diffusing. Work the diffuser around the back of your head using circular motions. Focus on the roots at the top of your head. Diffusing from behind will add body to your hairstyle.
-Add volume to your roots. Flip your hair back over and use the diffuser to lift your hair from the roots by catching it on the diffuser's prongs. Gently lift the roots, then drop them, lift them again, then drop them, repeating the process until your roots are dry.
-Create voluminous curls or waves. Use the diffuser to add volume to your hair shaft by working your way to the tips and pushing your curls up every few inches. This will encourage your hair to dry in its natural pattern, whether that be curls or waves, rather than drying straight.
-Finish at the tips. Place the diffuser under the tips of your hair so that it's pointed up at the ceiling. Dry your hair from below the tips, gently pushing them up at the same time, to create natural-looking curls or waves at the tips of your hair.
- To finish off, Add curl or wave-preserving hair serum. Use mousse, leave-in conditioner, or another hair product to keep your style in place. Apply it to your hair using a scrunching motion, rather than combing it in, to keep the style intact.
- Don’t comb or brush your hair after styling it with a diffuser, since this will cause the curls or waves to lose their shape. Use your fingers to comb through your hair if you need to remove a tangle.

- Your hair should have natural bounce after diffusing it. Don't apply too much hair spray or another heavy product, since this could weigh your hair down.

Hair up with Volume

  • Section the hair from the templates back to the crown, leaving the front 2 inches of the hair crimp free in order to have smooth top of hairstyle.

  • Backcomb the crimped sections of the hair

  • Smooth over the front 2 inches over the voluminous top section to quiff style, twist the hair in the back to grip and secure

  • With the two remaining hairs, section into two with one being slightly bigger/ past centre of the head ( this section must be from the opposite side to which the hair was twisted ) 

  • Pull this section across the hair and grip, being careful not the place the grips too low, ( CROSS GRIPPING )

  • Pull the smaller section of hair across and wist any loose hair to create a pleat.
  • Hairspray hands and smooth over the hair to catch any loose strands/ stray hairs.

  • Use the dressing comp ( 3 pinned end  to tease the front section to make sure no gaps or bumps are present, creating a perfect and symmetrical shape.


  • Hairspray all over to finish the look.